Instructions
Step 1: Preheat oven to 350°F (175°C). Grease a 9×13-inch baking dish or line with parchment paper.
Step 2: In a large mixing bowl, cream butter and sugar until light and fluffy. Add eggs one at a time, mixing well after each. Stir in vanilla.
Step 3: In a separate bowl, whisk flour and salt. Gradually add to the wet mixture until a thick dough forms.
Step 4: Spread ⅔ of the dough evenly into the prepared pan to form the crust.
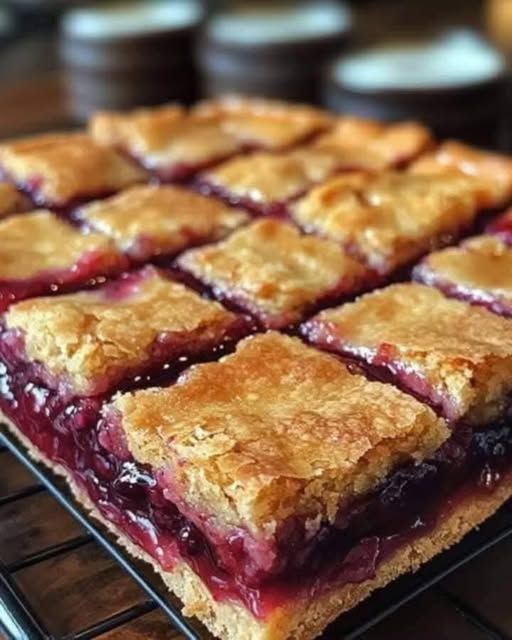
Step 5: Spread cherry pie filling evenly over the crust.
Step 6: Drop spoonfuls of the remaining dough over the top, spreading lightly for a rustic look.
Step 7: Bake for 35–40 minutes, or until golden brown. Let cool completely before cutting into bars.
Step 8 (Optional): Whisk together powdered sugar, milk, and vanilla to make a glaze. Drizzle over cooled bars.
Tips & Secrets
-
For homemade filling, simmer fresh or frozen cherries with sugar and cornstarch until thickened.
-
Chill bars before cutting for cleaner slices.
-
Add almond extract to the dough for a flavor boost that pairs beautifully with cherries.
Serving & Storage
Serve at room temperature or chilled. Store in an airtight container at room temperature for up to 2 days, or refrigerate for up to 5 days. These bars also freeze well for up to 2 months.
Variations
-
Swap cherry filling for blueberry, raspberry, or apple.
-
Add chopped nuts to the topping for crunch.
-
Make them extra rich with a layer of cream cheese filling under the cherries.
Conclusion
These Cherry Pie Bars are buttery, fruity, and easy to make — the perfect dessert for potlucks, parties, or family gatherings. They capture all the charm of a classic cherry pie in a convenient bar form that’s just as irresistible.

